Sunday 18 December 2011

GLUTEN FREE MAPLE CINNAMON CHOCOLATE CHIP COOKIES


Still on my quest for the perfect gluten free chocolate chip cookies. I think my recipe that I posted a couple weeks ago is hands down the best standard chocolate chip recipe. I wanted to spice things up a bit, so I tweaked the recipe a little to give it a little kick with some cinnamon and maple syrup. I loved how these turned out. The flavor is yummy and because of the maple syrup, the texture is moise and chewy, just how I like it!


Here's all you'll need. The syrup was camera shy, so didn't make it in. I don't bake with super fancy maple, it's just a standard gluten free maple pancake syrup.


Cream butter with sugars.


Add eggs, vanilla and syrup.


Blend until nice and creamy.


Add all the dry ingredients.


Blend until creamy again.


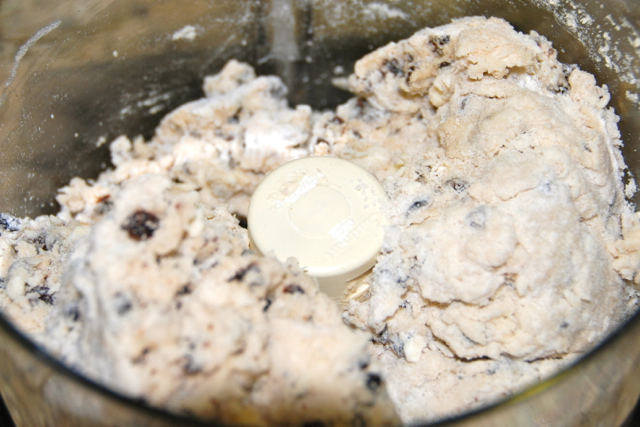
Add the chocolate chips.


Here's the dough, yummy!


spoon or scoop dough onto prepared cookie sheet. I use a 2 T ice cream scoop and they are just the right size. Then off to the oven they go. I bake in convection at 350 for about 8 minutes.


Remove from the oven when the edges are browning for a chewy cookie. Cook a couple minutes longer if you are looking for a crisp cookie. Cool on the pan for a minute or two before moving them to the wire rack, they are quite soft now.


Carefully move to a wire rack to cool completely.


Delicious!


Gluten Free Maple Cinnamon Chocolate Chip Cookies


Charene Whorton 2011


Ingredients


3/4 cup butter, softened


1/4 cup maple syrup


1/4 cup white sugar


1 1/4 cups packed brown sugar


3 teaspoon GF vanilla extract


2 eggs


2 1/4 cups GF baking mix


1/4 cup coconut flour


1 teaspoon baking soda


1 teaspoon baking powder


1 teaspoon salt


2 1/2 tsp cinnamon


2 tsp cream of tartar


12 ounces milk chocolate chips


Directions


Preheat oven to 350 degrees.


Sift together baking mix, coconut
flour, baking soda, baking powder, cinnamon, cream of tartar and salt and set
aside.


In a medium bowl or stand mixer.
Cream together the butter, syrup, brown sugar and white sugar. Add the eggs and
vanilla and mix until smooth.  Add the
flour mixture a little at a time until all blended. Add the chocolate chips and
mix just until incorporated into batter. 


Spoon onto cookie sheet, spacing
about 2 inches apart. (I use a 2 T ice cream scoop). Bake for 8-10 minutes
until lightly browned on the edges for a chewy cookie and lightly browned all
over for a crisper cookie. Bake for 8-10 minutes until lightly browned on the
edges for a chewy cookie and lightly browned all over for a crisper cookie. (I
cooked these at 350 convection for 8 minutes. They were perfect. Soft and chewy
when warm and firmer, yet still chewy when cool.)


Remove from oven and let cool on
cookie sheet for a minute or two to firm up. Transfer to wire rack to cool
completely.


If using 2T
scoop, this recipe yields 36 cookies.


Note: I use Bob's Red Mill Baking Mix
and don't add any Xantham Gum. Works great. I also use organic Coconut
Flour. 


If 36 cookies is more than you need, I've done the math for 1/2 a batch. You can getting the recipe by clicking here: Print 1/2 batch recipe


HOMEMADE ENGLISH MUFFINS

We are an english muffin eatin' kind of family. Frankly, I'd rather have
muffins over toast any day. My son likes them with melted cheese inside
and calls it a "cheese muffin". I use the muffin rings to cook eggs then add them to the muffin with sausage or bacon and cheese for an incredible breakfast sandwich!
I've always loved them and now that I
make my own, I can't see why I'd ever buy them again, these taste so
much better. 


Here's all you'll need. Pretty basic stuff, except for the dry milk. It was hard to find as I haven't purchased this in well, forever! Here's a hint, it's usually on the bottom shelf of the baking isle near the flour.


Add the dry milk, sugar and shortening to a large bowl. Add the hot water and stir to dissolve.


In a separate bowl, combine the yeast and sugar and WARM water, not hot. Stir GENTLY to dissolve. We don't want to disturb our little yeasts too much.


Add the yeast mixture to the dry milk, which is now wet, and add the sifted flour.


Stir until it looks like this.


Cover and place in a warm place for about 30 minutes.


30 minutes later...


Just before cooking, add 1 tsp baking soda and 1/2 tsp salt. This is going to create all those nooks and crannies.


Get out your muffin rings. Or egg rings, or hash brown rings. Whatever you call them, now you need them. These are actually a little small, 4". I would prefer they didn't have handles as these really should be covered for cooking. I'm upgrading to 6" rings with lids so I can really get this thing going.


Heat the grill to medium heat. Spray the inside of the rings with nonstick spray and I like to sprinkle in corn meal for a traditional english muffin feel.


Use my handy dandy 3 T ice cream scoop


Scoop in 1 scoop. Wait about 30 seconds, scoop in another. This creates the "fork split" feature. Or just dump it all in at the same time if you don't care about that... Okay, before we move on, I just have to tell you about the consistency of the batter/dough. I want to warn you so you're not caught off guard when  making these and lose your appetite. It's a strange consistency, how can I say it.... Gelatinous? No, it's worse than that. Okay, I'll say it... mucousy. Please trust me when I say that it's hard to deal with here, but it'll totally be worth it when they're cooked!!


Cook for 5 to 6 minutes.


Normally you would flip these with the rings on them, but since mine have handles, I remove them now.


Then flip them. Cook for 1 to 2 minutes. They are already mostly cooked, they just need the top browned.


Remove and enjoy!!


Oh, the nooks and crannies!!


Here are these muffins with eggs and cheese. I used the muffins to cook the eggs in and also cut the cheese into rounds. Feel free to add bacon or sausage and it's the perfect breakfast sandwich!


English Muffins


Adapted from Alton Brown – Food Network


Ingredients


1/2 cup non-fat powdered milk


1 tablespoon sugar


1 teaspoon salt


1 tablespoon shortening


1 cup hot water


1 envelope dry yeast


1/8 teaspoon sugar


1/3 cup warm water


2 cups all-purpose flour, sifted


Non-stick vegetable spray


Corn starch for grill


1 tsp baking soda


Directions


In a bowl combine the powdered milk, 1 tablespoon of sugar, 1/2 teaspoon
of salt, shortening, and hot water, stir until the sugar and salt are
dissolved. Let cool. In a separate bowl combine the yeast and 1/8 teaspoon of
sugar in 1/3 cup of warm water and rest until yeast has dissolved. Add this to
the dry milk mixture. Add the sifted flour and beat thoroughly with wooden
spoon. Cover the bowl and let it rest in a warm spot for 30 minutes.


Preheat the griddle to 300 degrees F or medium on griddle over flame on
stove.


Add the remaining 1/2 teaspoon of salt and 1 tsp corn starch to mixture
and beat thoroughly. Place metal rings onto the griddle and coat lightly with
vegetable spray. Using 3T ice cream scoop, place 2 scoops into each ring and
cover with a pot lid or cookie sheet and cook for 5 to 6 minutes. Remove the
lid and flip rings using tongs. Cover with the lid and cook for another 2 to 2
minutes or until golden brown. Place on a cooling rack, remove rings and cool.
Split with fork and serve.


CURRANT SCONES


It's biscuit Sunday again and today I'm making something near and dear to my heart. I've been making these for more almost 20 years and they really bring back good memories. It's a great pastry to have with morning tea or coffee or at the end of the day after dinner. Enjoy them warm with butter or jam or just as they are, a special treat anytime! I hope you enjoy them as much as I have over the years.


Everything you'll need. Except swap that soda over there for salt. Oops.


Mix dry ingredients. Cube butter and cut into dry mixture.


Keep cutting in butter until it looks like coarse crumbs.


Add remaining ingredients.


Pulse or stir until all blended.


Roll out onto floured surface. I had no idea my counter top was going to blend in so well to this dough! I'll call it currant scone color from now on. Knead the dough 20-25 times.


Kneaded dough is all ready for baking sheet. Now that it's not blended into the counter, you can see how nicely the currants are blended through. These are going to be yummy!


Shape into just about any shape you want from here. Make them into rounds with your fingers, spoons or use an ice cream scoop for uniformity, it's up to you, they will all taste fabulous!


Line them up on a cookie sheet. They don't expand too much, so you can have them fairly close together.


Sprinkle with a little sugar, just for fun. And because I like everything with a little more sugar sprinkled on top!


Remove from the oven when are light brown. These are a little bit darker than light brown. I got distracted...


Move to a wire rack to cool a bit, just so you don't burn your tongue like I do. I can hardly wait for them to cool before I'm breaking one open to eat it!


So lovely.


I hope you enjoy my currant scones.


Currant Scones


Charene Whorton 1992


Print version


Ingredients


3 cups flour


3/4 cup sugar


2 tsp baking powder


1/2 tsp salt


3/4 cup cold butter


1 cup currants


3/4 cup milk


2 tsp vanilla


Directions


Heat oven to 400. Lightly grease or line a cookie
sheet with release foil.


Mix flour, sugar, baking powder and salt in bowl or
food processor. Cube butter and add to mixture. Cut into mixture with pastry
knife or pulse food processor until it looks like coarse crumbs.


Stir in currants, milk and vanilla. Stir or pulse a
few more times until well blended.


Turn dough out onto floured surface and knead 20-25
times.


Spoon into rounds onto cookie sheet or use ice cream
scoop for uniform shape.


Sprinkle with a little sugar on top.


Bake 15-20 minutes or until light brown.